Blog
How to Choose a Bookshop Bag for Hardcovers, Paperbacks and Paper Goods

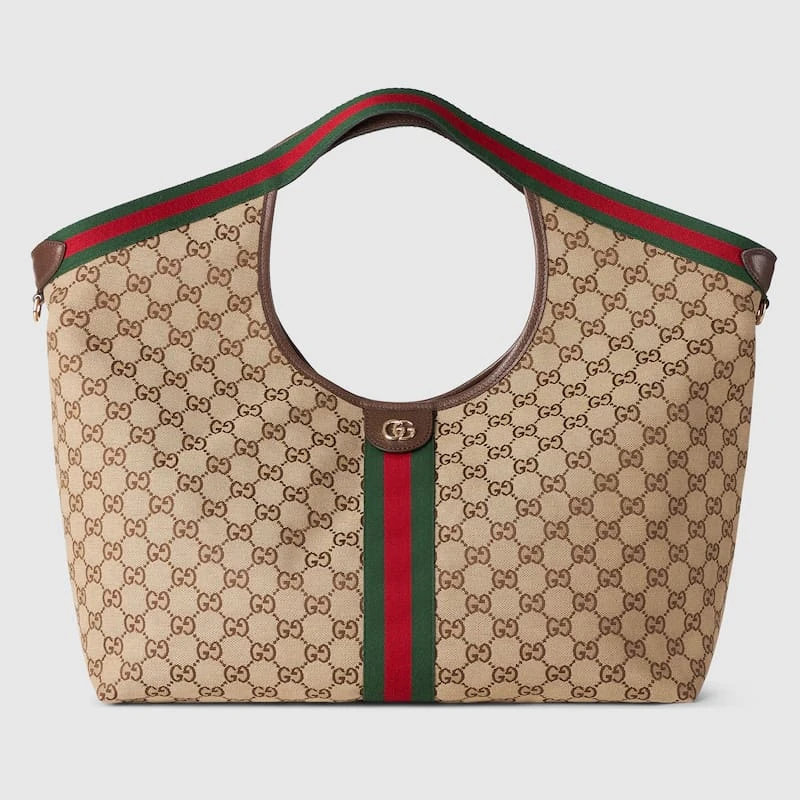
A bookshop bag has a particular job. It takes a book that was never designed to bend, slips a receipt or card somewhere you can find it, and makes room for a small stack of things without turning the corners into supports for everything else. The book may fit along the bottom once inside and still be difficult to get past a zipper, the handle mounts or a divided opening. A bag that looks generous from the front can be much more specific about what fits through the top.
Start with the books and paper goods you actually buy. A paperback novel, a hardback with a wide jacket and a rigid envelope for a print each create a different shape. Then compare the body and the way you can move the item through the opening. The tote collection offers a useful range of galleries to study. The choice can be a tote, a medium shoulder bag or a smaller bag for your own essentials with the book carried separately. The best arrangement depends on which part of the load needs to stay flat and when you want your hands free.
Start with the rigid shape that sets the limit
Pick up the tallest book you expect to carry frequently and measure its covered height, width and thickness. Include the dust jacket, any slipcase you would keep on it and the edges of the cover boards. A tall paperback can curve slightly when handled. A hardback has corners that stay where they are, and its covers can extend beyond the page block. Paper goods may be sold in a sleeve, envelope or backing board that is larger than the sheet itself. Use the size of the package you actually intend to carry.
Make three rectangles on a page or cut them out of spare cardboard. One represents a paperback, one represents the rigid book you want the bag to fit, and one represents a flat purchase such as an envelope with stationery. Give the cardboard stack the thickness of the book with a folded piece or another safe substitute. You can use these pieces to test openings and positions without risking the corners of your books. Mark the top and spine edges so you can remember which way the object turned during each trial.
Add what you already carry when you walk into the shop. A phone, wallet and keys may leave plenty of room when spread over a table, yet each one needs to stay accessible after you put a large flat object in the bag. If the bag is meant to carry a notebook on the way there and a purchase on the way home, test the two together. A fit test with an empty bag answers whether the rigid piece can enter in ideal conditions. A second trial with your usual contents answers whether it works as part of your day.
Measure the opening in the direction the book has to travel
Look from above at a bag you already own. See where the usable opening starts and ends while the bag is resting on a counter. A zipper can finish before the side seam. A snap can divide the middle of a broad top. An inner divider can leave plenty of volume on either side and limit the size of any one flat piece. The carrying handles can sometimes lie across the very edge where your hand needs to guide the book. These details tell you more about what happens at the top than the widest line across the front.
Use two stiff pieces of cardboard to create a doorway in a tray. Lay your rigid mock book beside it and try to lower the mock-up through in the direction you would naturally use. Start straight. If the long edge catches, try a gentle angle and see what clearance is needed for the far corner to swing. Then remove it using the same grip. The removal step matters because the book can slide down while you pack it and still leave you with nowhere to put your fingers to take it out.
Try the opening with a handle or zipper stand-in near one end. Move a piece of tape or a soft strip into the place where a pull or handle would sit. That can show why a slight gap on one side is more useful than a similar amount of extra space in the middle. If the cardboard has to bend, the bag has to be held wide with two hands or the rigid corner has to be pressed through, that measurement is too tight for this use. Write down the clearance that lets the item move freely in both directions.
Understand when an angled entry helps
A corner-first path can work well when the opening is slightly shorter than a straight edge but broad enough in the other direction. It gives you a moment to pass the first corner and then rotate the rest of the item into place. It also needs depth below the opening. The bottom corner has to go somewhere while the top corner turns. A shallow compartment or a tall close-fitting divider can stop that turn even if the top looks wide enough in a photograph.
Try the mock book both with the spine lowered first and with the opposite edge lowered first. Your grip may change the path. A flat envelope is often easier to support by its two longer sides, while a heavy book may feel better supported from beneath. If you have to change hands halfway through, plan where the bag will rest. It is easier to pack a rigid purchase cleanly when the bag stays steady on a table and the other hand can guide the book. A bag you normally keep on your shoulder may give you less usable opening width because of the way the strap pulls the top together.
Check the resting position separately after the book goes in. A corner-first entry can leave the book horizontal if there is enough room to turn fully. It can also leave it at an angle, where one point presses into a sidewall or stands up into the closure. Move the mock-up gently and see where it would come to rest during a walk. A setup that leaves the cover supported and the top closure free is easier to repeat than one that requires holding the book in a particular place while closing the bag.
Compare photographs of the rim, the interior and the base
Start with a front image to understand the overall proportion. Move to a top or three-quarter view to see which edges define the opening. A side view can tell you how far the upper panels narrow and how much depth remains under the opening. Check the direction and location of the handles. Then look for a view of the base, particularly if you want to carry a book upright with one cover against the wall. A broad base and a roomy top do different jobs. You need the two views to understand how the object gets in and where it rests.
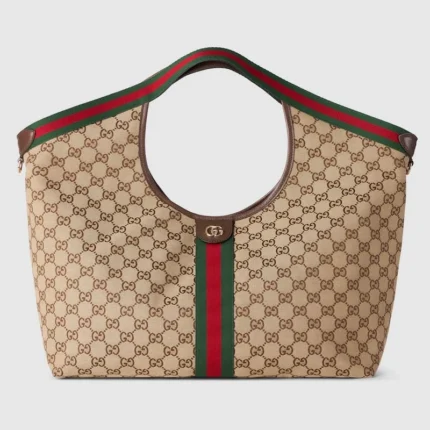
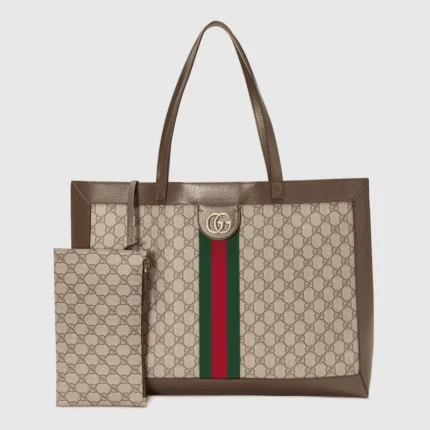
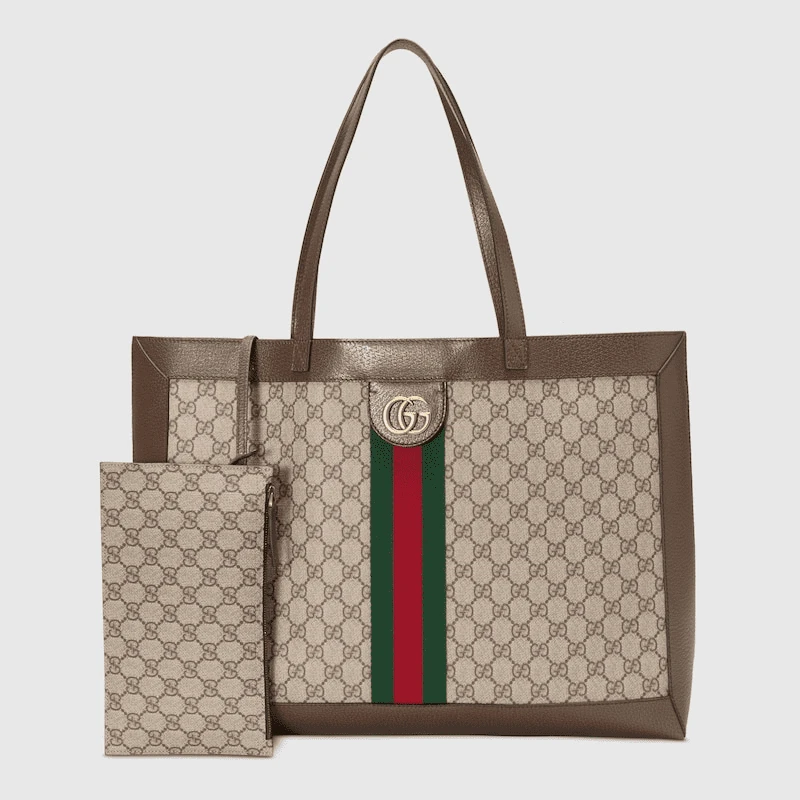
The Gucci Giglio large tote gives you an example of a tote that lists a detachable pouch. Compare its top and interior views with the Gucci Ophidia medium tote. Think about what would happen to the opening path if the pouch or an organizer were placed near the edge where a book needs to turn. A different way of arranging small items can make the same bag easier to use. The two listings give you a way to see the geometry and features of each selected model.
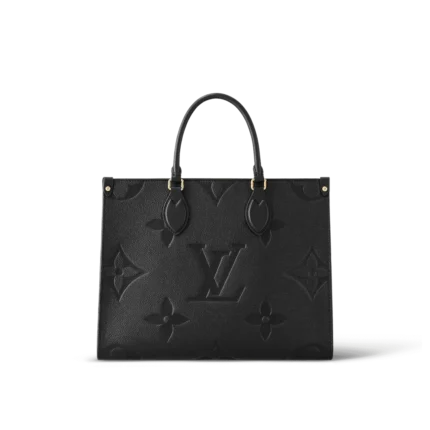
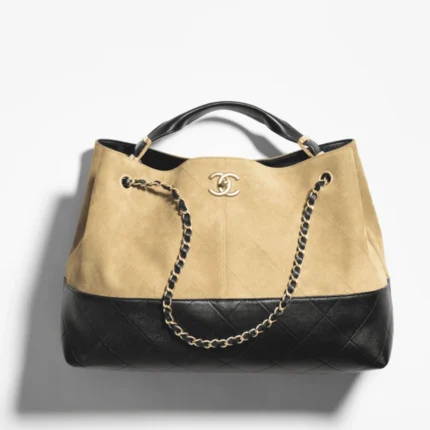
Look at the Onthego MM M45595 and Chanel 25 Shopping Bag galleries as additional examples of how carrying pieces and the shape of the upper body change what you can see. Follow the edges on each image rather than assuming the model name tells you the usable opening. Read the units and the order of any listed dimensions. If there is a critical measurement the product page does not give, ask customer support about the clear opening for the selected option and the position of any internal divider.
Give books and thin paper different storage positions
A rigid book has some support built in. A greeting card, print or booklet can take the shape of whatever presses against it. Place the flat paper item in a sleeve or backed envelope if that suits the purchase. Measure the outside of the protected package. Choose a position where the plane of the item can stay flat. When you stand it against a wall of the bag, check for a seam, pocket or attachment point behind it. When you lay it flat, check what will sit on top of it and whether you can lift it without pulling everything else out.
Practice packing a thin item alongside a hardcover. A broad cover can create a flat neighbor, while its corners and weight can also make it a poor neighbor if the paper sticks out. Compare the dimensions and align the edges so you can see where the paper remains exposed. Put the rigid item in first and add the sleeved paper last if that gives you a clear route. Try removing the paper without using its corner as a handle. The aim is enough finger space at an edge and a place for the piece while you close the bag.
Receipts and small paper items deserve a different decision. A zipped pocket or small pouch can keep them available without storing them against larger papers. If you often buy a gift card, a card sleeve or pocket that will hold the envelope at its natural width may be convenient. Make the space easy to identify by touch. That way you can separate a ticket, receipt or small note from the paper purchase you want to keep flat until you arrive home.
Separate what can spill, rub or catch
Think about the route between the shop and home. If you buy a drink or bring a bottle, decide where it will go before packing paper or a book. A separate carrying position can give the paper its own dry space. A bag with a separate pocket can help keep a well-closed bottle upright if that is an arrangement you can check in your own bag. The product's material and photos alone tell you little about what happens if a bottle spills inside or rain reaches an open top. Carry paper and liquids in a way that suits the conditions you expect.
Move your keys and any metal accessories to a closed pocket or separate pouch so they have a defined location. Check the inside of the bag where a cover or envelope will rest. A zipper pull, strap clip or raised part can meet the corner of a book each time the bag moves. Give the item a smooth path where possible. A cloth cover or sleeve can suit some books, as long as you include its extra size when you test the opening. Loose items can also sit directly in the hand space you need, making a generous bag feel crowded at the moment you take the book out.
If you carry a folding umbrella, decide how you will handle it after it has been used. A wet umbrella and paper goods call for different places even if they fit together neatly when everything is dry. Before you leave the shop, take a moment to place the envelope in its flat area and the smaller things in their familiar pockets. Once the bag is packed, check that the closure lies freely and that the book can remain where you put it without you holding it in place.
Build three layouts for three different trips
For a quick visit with one paperback, take the paperback and your everyday items to the table. Try the paperback upright and flat. Put the phone somewhere you can reach without taking the book out. A compact shoulder bag may work if the shape, opening and loaded position suit the paperback. If it takes effort to pull the book past the closure, you may be happier carrying the book separately and using a small bag for your own essentials. Give the quick visit a simple layout rather than making room for purchases you rarely make.
For a hardcover outing, build a layout around the largest book you regularly choose. Test the angled path and see how the book rests when the bag is set down on its base. Put your wallet and phone near the opening and check that neither ends up pinned behind a broad cover. Walk around your room once with an ordinary load you are comfortable carrying. Pay attention to how the body changes shape and where the weight settles when you lift it by your chosen handle. Choose the arrangement that allows you to set it down and pick it up predictably.
For a visit that might include a print or stationery, give the largest expected envelope the deciding role. Use the backed shape in the mock test with the book already in place. Check how the two pieces enter and whether the envelope extends beyond the top in the resting position. If you occasionally buy something larger than your normal bag can accommodate, plan for the shop's packaging or carry a separate suitable sleeve when needed. A bag that handles the usual visit gracefully can still be the right everyday choice.
Write down the fit you can use on the next listing
Put the three measurements you care about next to a sketch of the bag opening. Add the clear doorway you needed for the rigid book, the depth below that doorway where you could turn it and the flat area where the paper could rest. Each value comes from your own mock-up. When you open another product listing, see which of the three you can confirm with the published measurements or photographs. Save the bag link and make a note of the missing view or dimension. This prevents a memory of one roomy-looking photo from getting mixed up with the evidence for another candidate.
For a shortlist, test the same paper and rigid shapes each time. Use one item you carry often and one you plan for only on some visits. If the second item determines the size of every bag you consider, ask how often you need it inside the bag. Compare the gain in capacity with the way the bag feels for the everyday route. If both are equally important, compare the bags on the opening and whether each one has a realistic place for paper, books and the pieces you need first.
A good bookshop bag makes the counter-to-street moment simple. You can support a book as it enters, let it rest where the body has room for it and reach the other things you need. The same test works when a bag is compact or generous. Study the doorway, plan the resting position and leave a clear path for your hands. Those small measurements make the photos and dimensions on a product page much easier to put to work.
Compare these products